How to Add Macro Actions to the Script
Macro Actions can be added to your script in multiple ways. This tutorial outlines the steps to quickly add actions to a script. Generally, macro actions either require screen coordinates (such as Left Click, Right Click, or Double Click) or do not require coordinates (such as Keystrokes, Launching Applications, or Window controls).
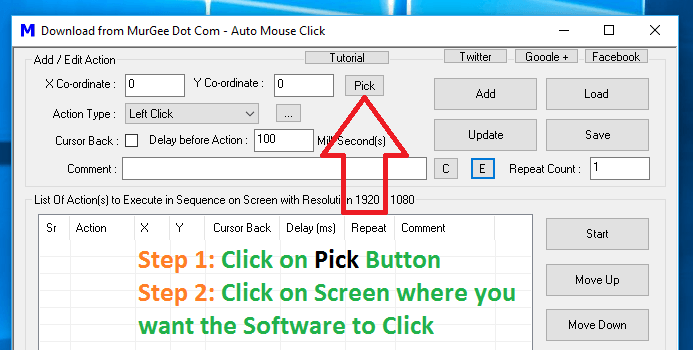
Picking Screen Locations and Adding Macro Actions Easily
When automating mouse actions in a script, you can use the Pick button to target screen locations. For example, to add a Left Click action, follow the steps below:
- Click on the Pick button. Note that the software will minimize automatically and the mouse cursor will transform into a target crosshair.
- Manually click on your desired screen location.
- The software window will restore automatically and append the Left Click action with your selected coordinates to the script.
You can repeat this process to add as many click actions as needed. This targeting method works for any coordinate-based action, including Right Click, Double Click, Middle Click, and Shift + Click.
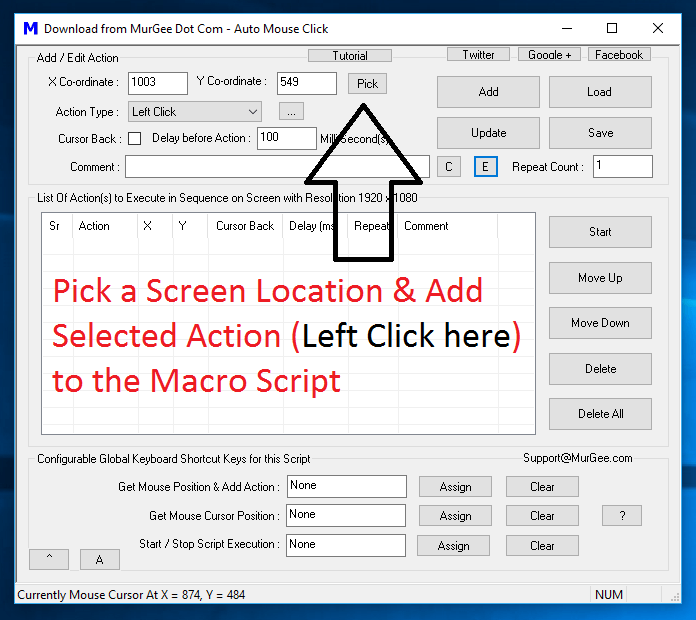
The current mouse cursor position is displayed in real-time within the software status bar located at the bottom of the window (e.g., Current Mouse Cursor at X = 874, Y = 484). You do not need to record coordinates manually—the software captures and stores them automatically.
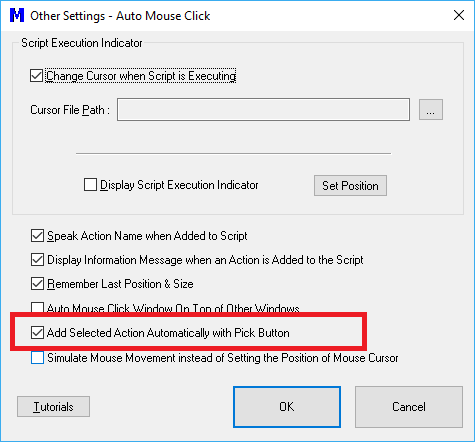
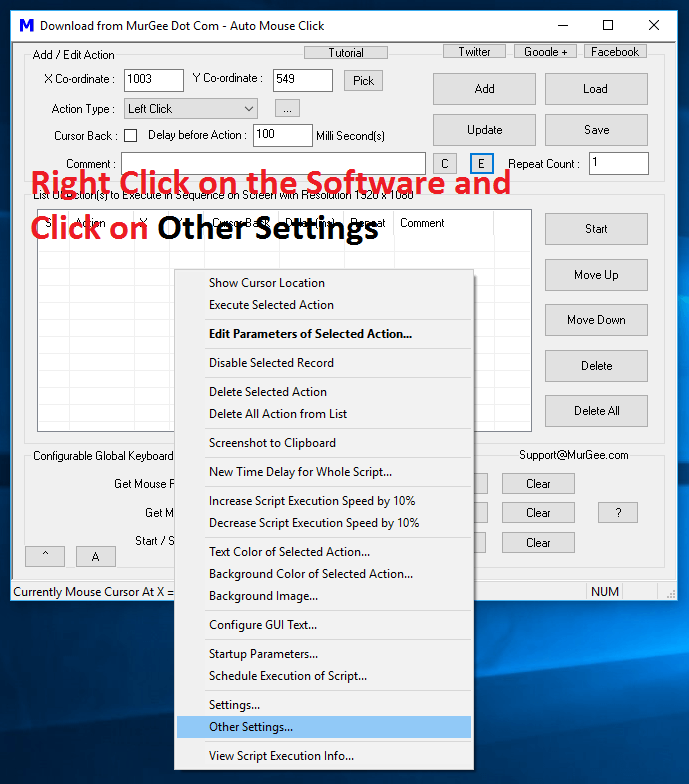
The operational mode of the Pick button can be customized via the Other Settings option in the right-click menu. The right-click menu provides access to numerous helpful features designed to streamline macro editing.
Adding Macro Actions using Keyboard Shortcuts
Another fast way to populate your script is by assigning a keyboard shortcut. Pressing the shortcut key automatically grabs the current cursor coordinates and appends your selected action to the script.
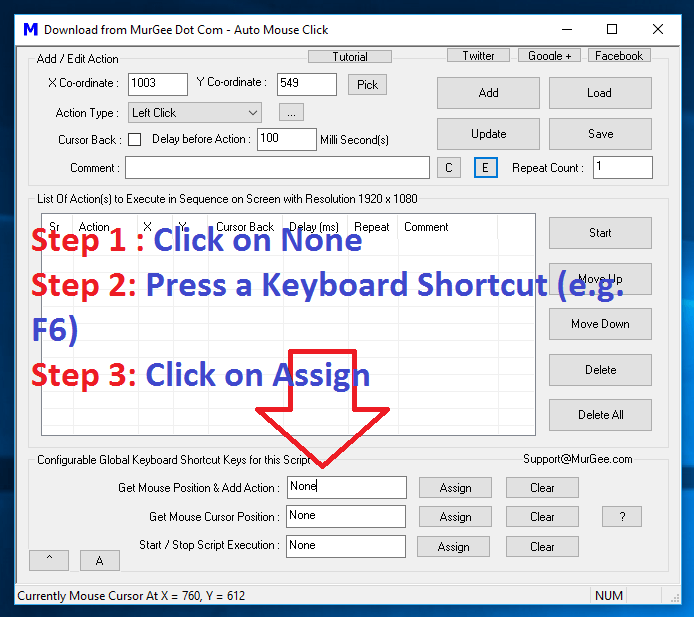
Keyboard shortcuts are especially efficient when capturing multiple screen locations in rapid succession. To assign a shortcut:
- Click on the hotkey box displaying None.
- Press your desired shortcut key combination (e.g., F6 or Ctrl + W).
- Click Assign.
Once configured, hovering over any screen point and pressing your shortcut will instantly log the coordinates and append the selected macro action. You can further customize shortcut behavior and confirmation popups inside the Other Settings screen.
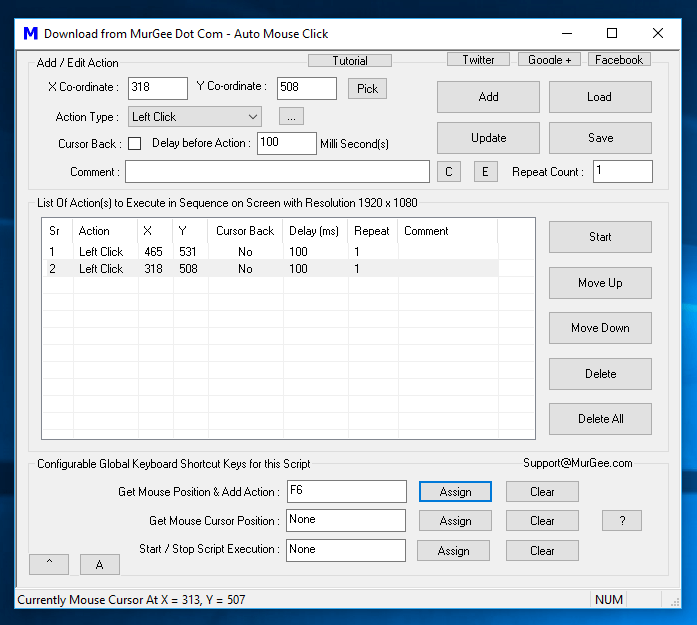
This tutorial covers the primary methods for adding macro actions to your automation scripts. You can also watch Auto Mouse Click Video Tutorials to explore further script editing techniques and advanced automation capabilities.